
shared bedroom room for W&C - one room challenge week 3

Believe it or not, this is technically the halfway point in our six-week decorating project. Anyone nervous? Don’t worry. We’ve totally got this. Assuming everything actually shows up in time. More on that in a moment…
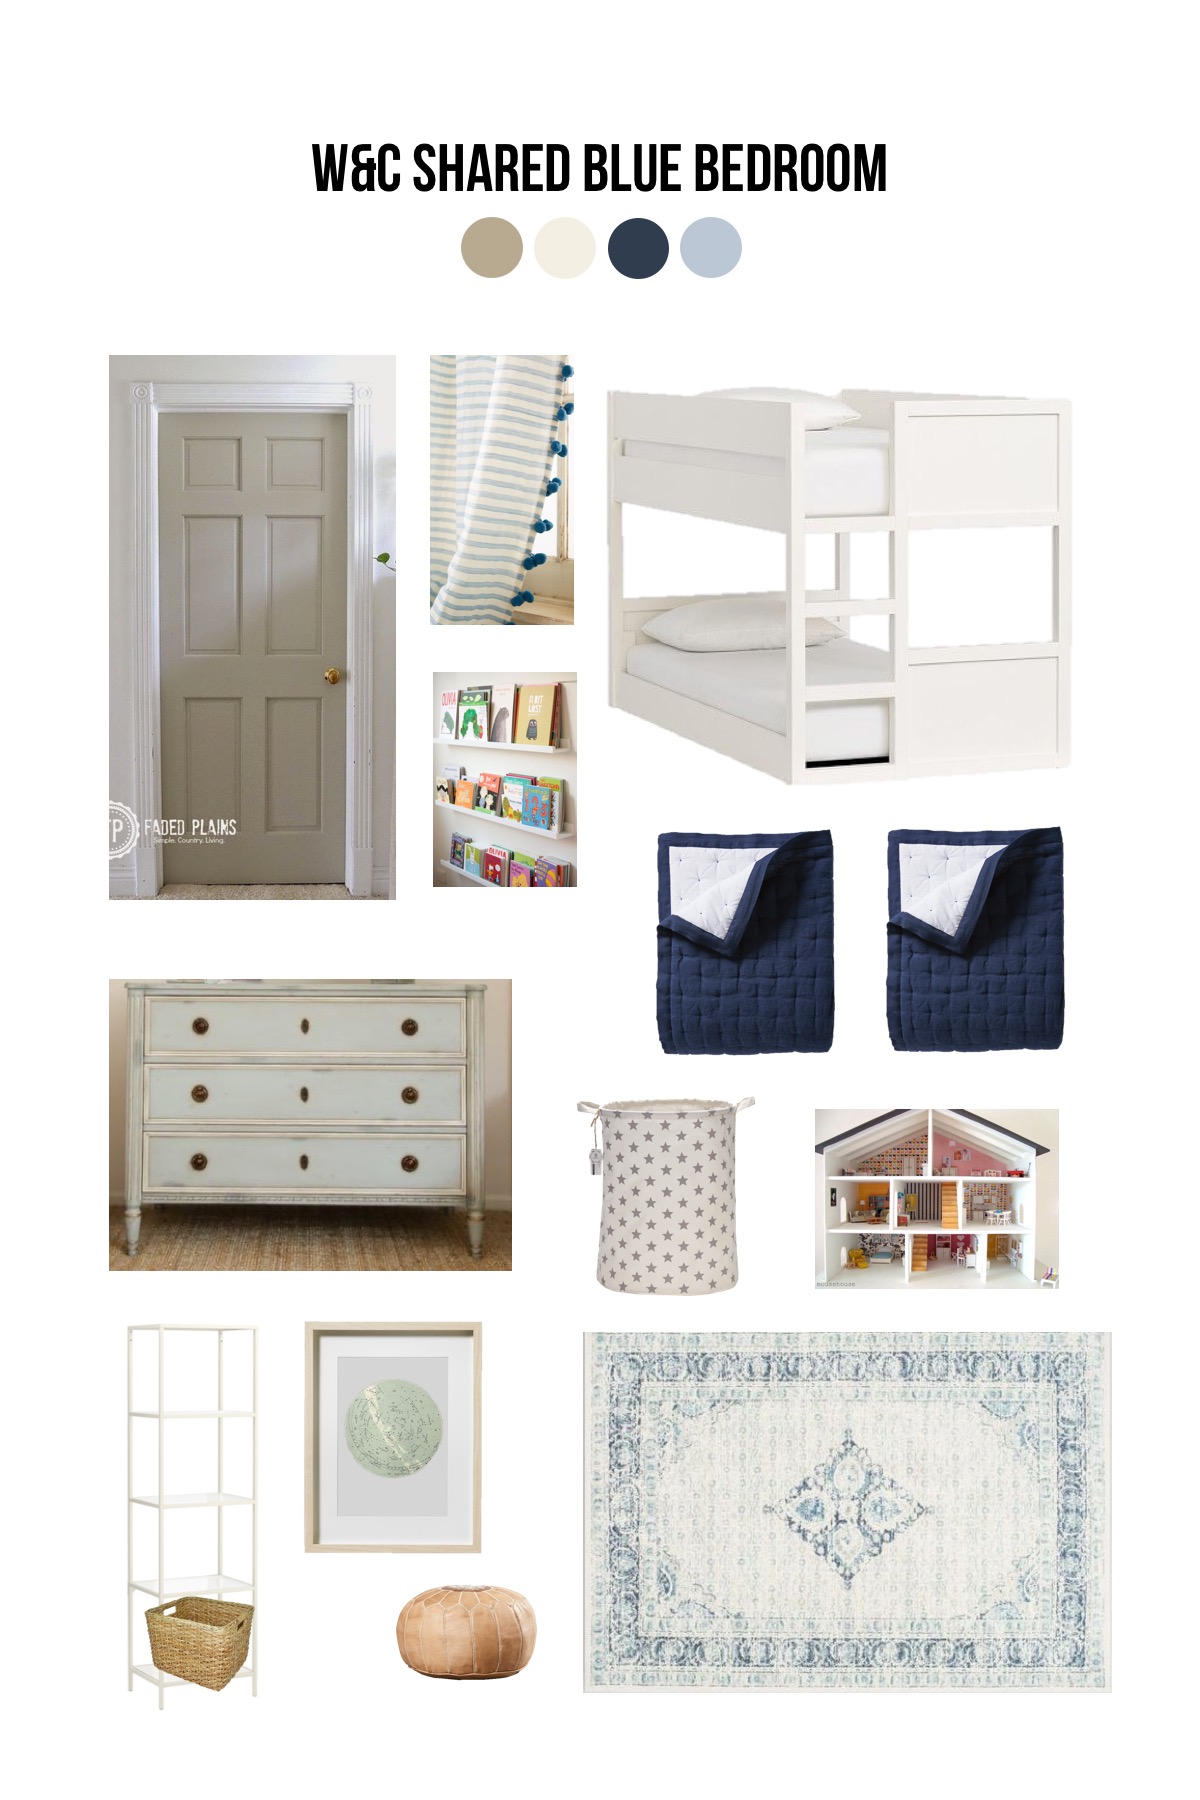
Quick refresh: W & C are moving into a shared bedroom to make room for their new baby brother or sister. W is all over the PJ Masks posters and C is very much keen on sparkle, princess, and more sparkle. Mom, Whitney, has a traditional, sophisticated style, and is not interested in cartoon characters adorning her walls. Dad, Dusty, is easy going, totally fine with both PJ Masks and princesses, and is fortunately up for painting, building, moving, and all other tasks related to getting this room done.
Last week, we decided which bedroom would become the kids’ new shared bedroom, picked a floor plan, and decided on a color palette. We also outlined what large pieces we actually need for the shared bedroom (a bunk bed, a dresser, and a rug). We decided to paint the bedroom white, leaving the exiting trim until such time as Whitney and Dusty can repaint the entire house (white, if she had her way). This week, we got to work on all of those items, picking furniture, a rug, and white paint. Let’s start with the paint.
Paint

Every room in Whitney and Dusty’s house is painted Sherwin Williams Wool Skein with Universal Khaki trim. Whitney would love to paint the entire house white but you and I both know how overwhelming (and expensive) it is to repaint an entire house, including trim. For now, we’ve decided to start with the walls in W & C’s shared room, leaving the trim as is to match the rest of the house.
We dug through several whites in the Sherwin Williams rolodex, landing on Greek Villa and Whitetail as our favorites that might work with the Universal Khaki trim. Dusty painted samples of both on each wall in the room.

We were all surprised at just how white both of these colors looked next to the existing tan. Whitney chose Whitetail as it was slightly warmer than Greek Villa in all light. Overall, the room looks much brighter with the new paint.

Kid-friendly Rug
Many (most) decorators will suggest that you first pick a rug before picking a paint color because the rug is typically the largest purchase for a room, both in size and in price. This is an extremely good idea that we ignored. There was only one weekend that Dusty could reasonably paint the room, and we needed a paint color faster than we could pick a rug. But that’s ok because I found some pretty excellent rug options after we chose the paint color.
Here are a few of the options we looked at before our final decision (note that there are some affiliate links coming up - don't worry, they won't bite you).
In this case, neither of the kids had a strong opinion about rugs. They are five and two and a half after all. The most important thing to Whitney was that the rug easily hide dirt (read: have a pattern) and be somewhat durable. We also needed a rug that wouldn’t blow the entire budget.
The rug Whitney chose came *very* quickly and has already been put down in the room. It is much more tan than it showed up online, but in this room, that works.
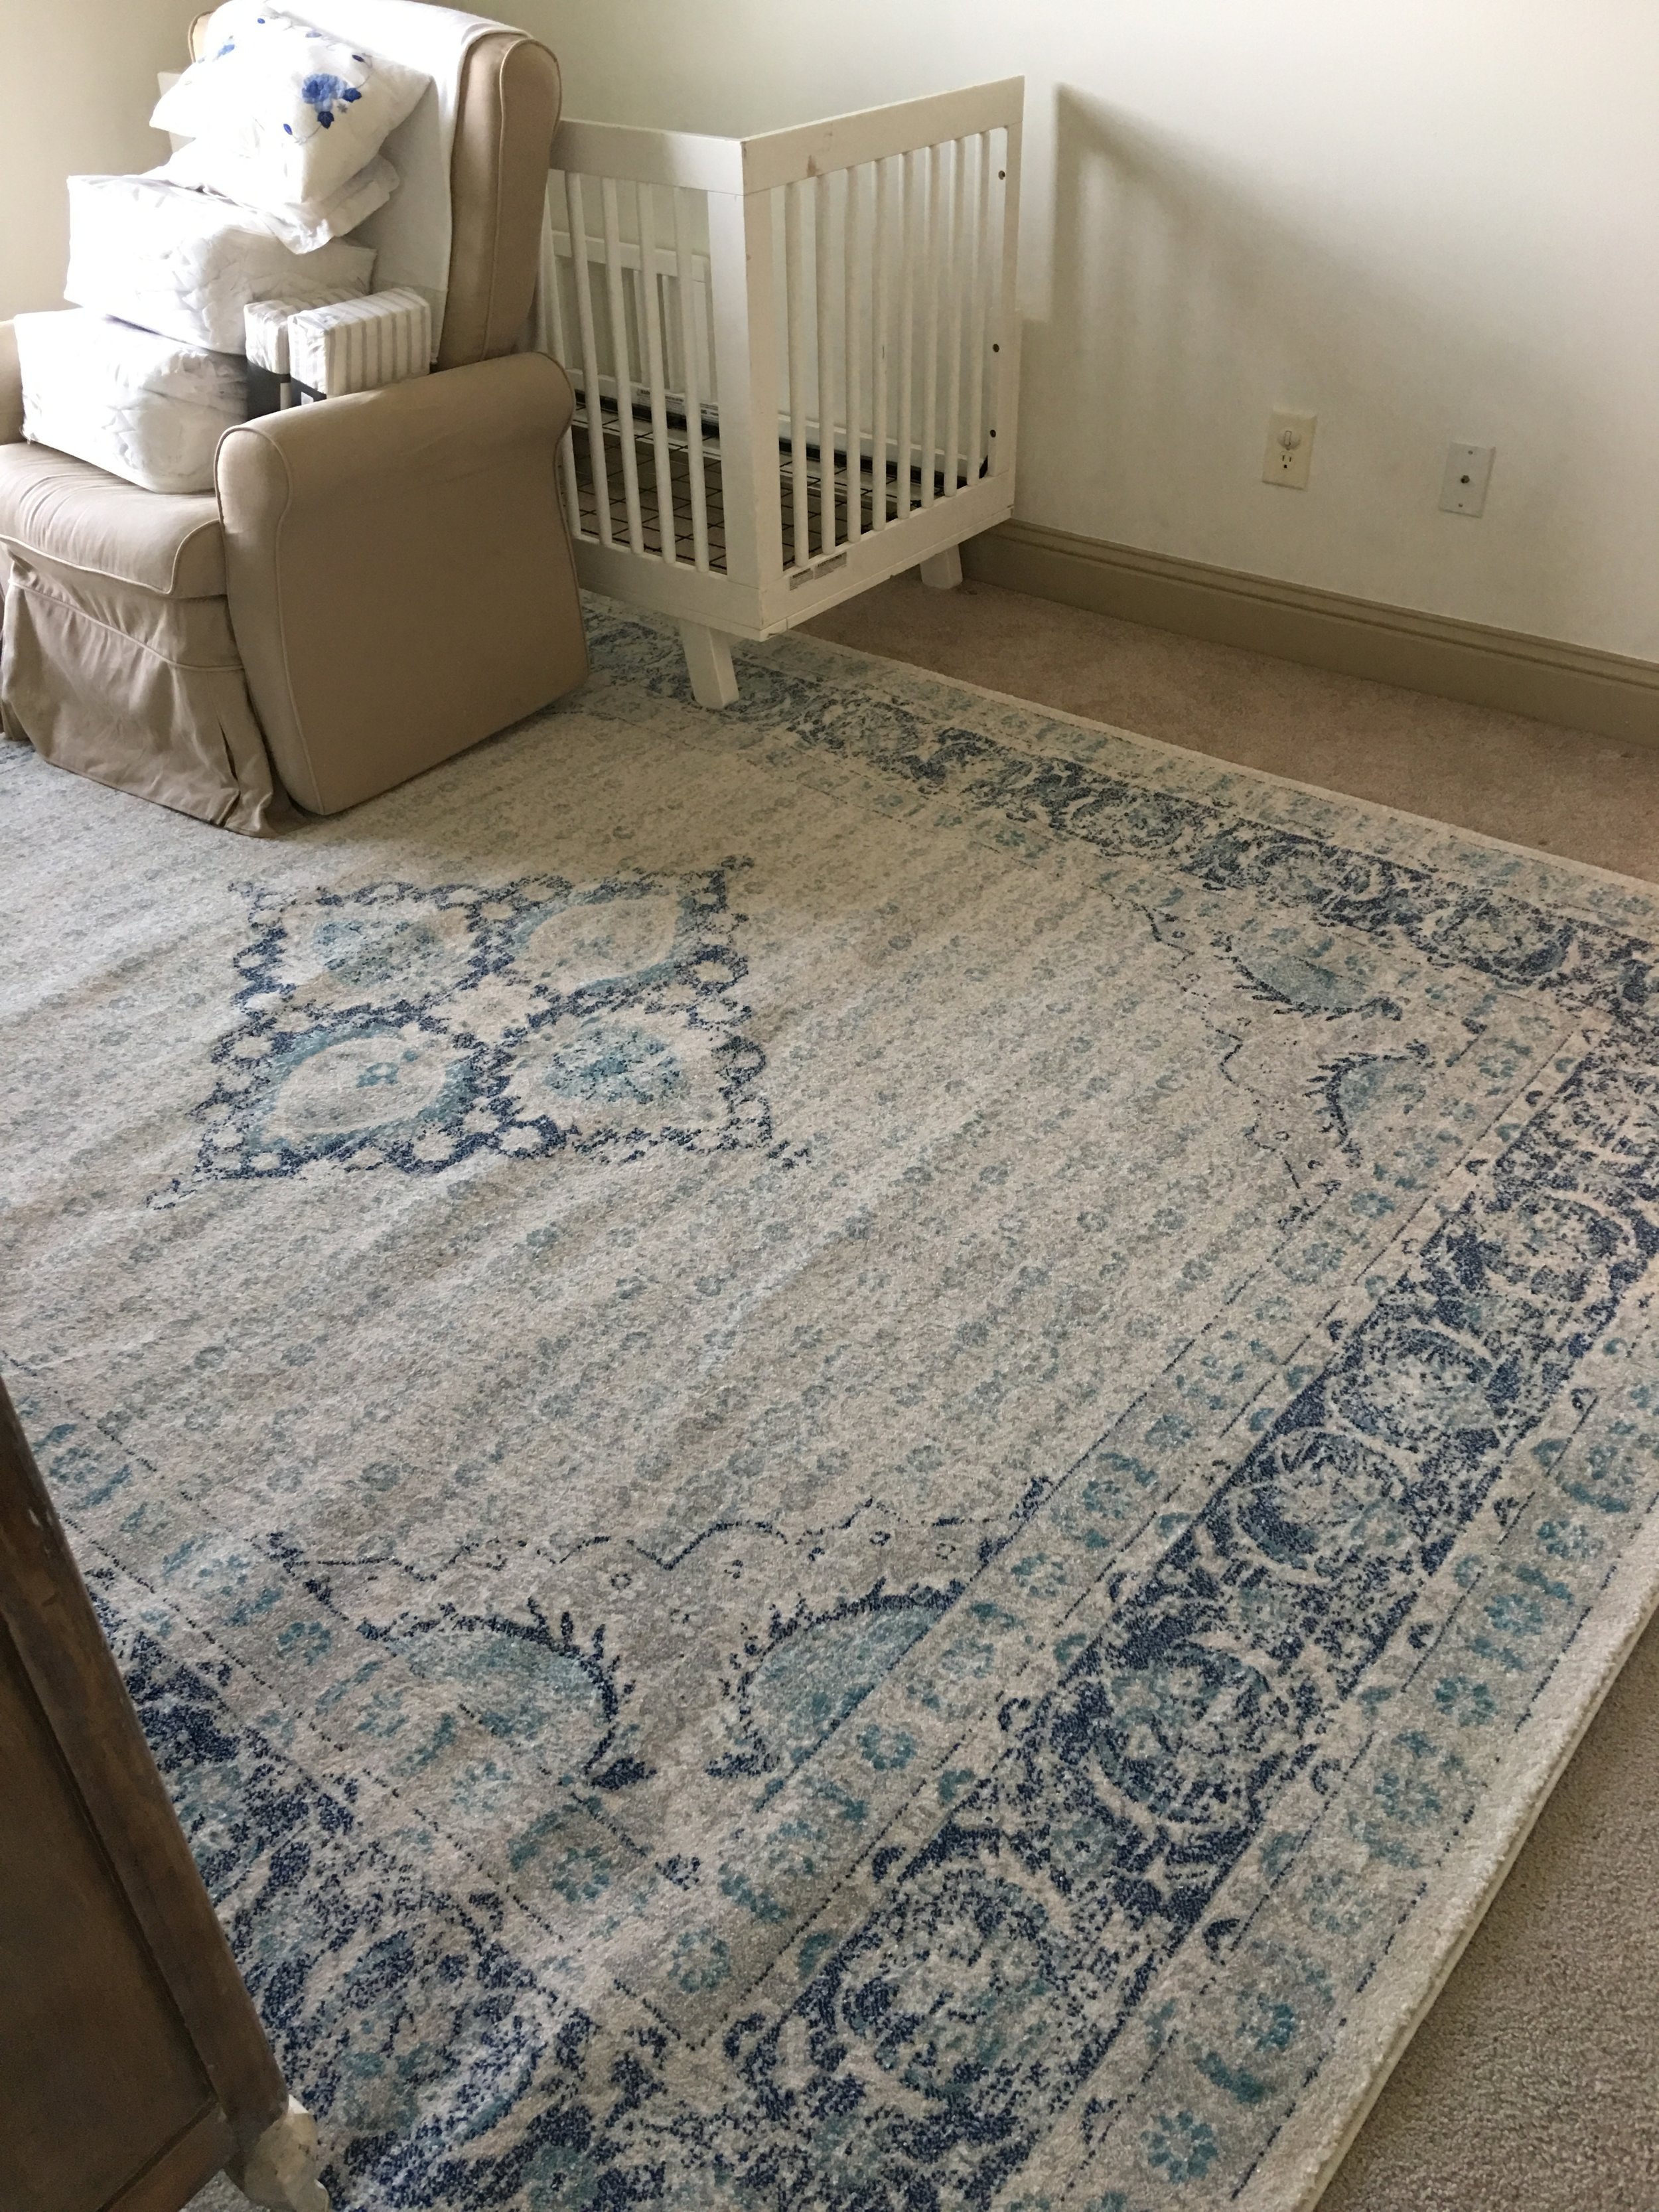
(P.S. Buying rugs online can really be a challenge. Check out tips for buying furniture online here.)
Bunk Beds
Bunk beds are the obvious option for kids sharing a bedroom, right? They are ridiculously popular with kids and can be a great way to save space in a small room. They are also a complete pain in the butt from a bed making perspective. Most parents do not consider this when they purchase bunkbeds. Thank goodness for my mother-in-law, who kindly pointed it out before we put our older kids in bunks some 15 years ago. We, of course, bought bunk beds anyway, and my mother-in-law was, of course, absolutely right. By the time we moved the kids out of the bunkbeds, my husband wanted to burn the beds.
They say stupidity is doing the same thing twice and expecting things to change. Yep. You know where this is going. We bought a bunkbed once again when our younger kids outgrew their converted cribs. This time, we bought a lower bunk because the kids were only 4 and we were afraid they would fall out. It was still hard to make the bed.
Unfortunately for Whitney, we’ve not a whole lot of choice on the bunkbed situation in this shared kids’ room. There just isn’t enough floor space for the kids to move around the room with two individual twin beds. This will be especially true as the kids grow. Right now, though, because the kids are young, it doesn’t make sense to put them in a traditional bunk bed, which would be too high off the ground. We needed a low bunk at a good price point. Ikea to the rescue.
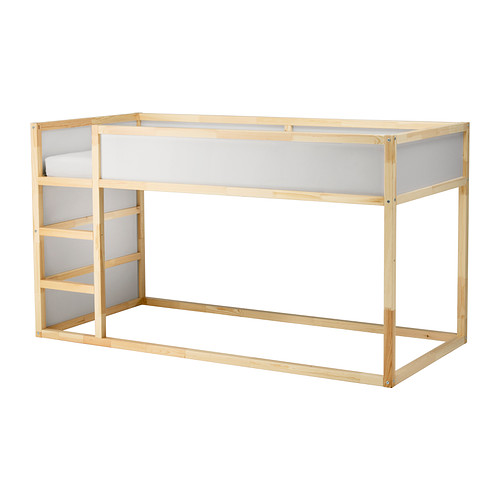
There are some really cool low bunkbeds out on the market now, so you definitely have choices if you are not an Ikea fan. Both Crate and Barrel and Pottery Barn Kids make nice looking options. I also really love this metal option from Room and Board if you have the budget.
We (Whitney) will be painting this bunk white so that it blends into the room and the bedding pops. We will get to the bedding in a week or so. More importantly, did you know that you can get IKEA to deliver your stuff, even if you don't have a local IKEA? I didn't either. Except that you need to be prepared to wait. This bed isn't due to delivered until the end of April. Some of us may be biting our nails that this room will be complete by May 10.
shared kids’ dresser
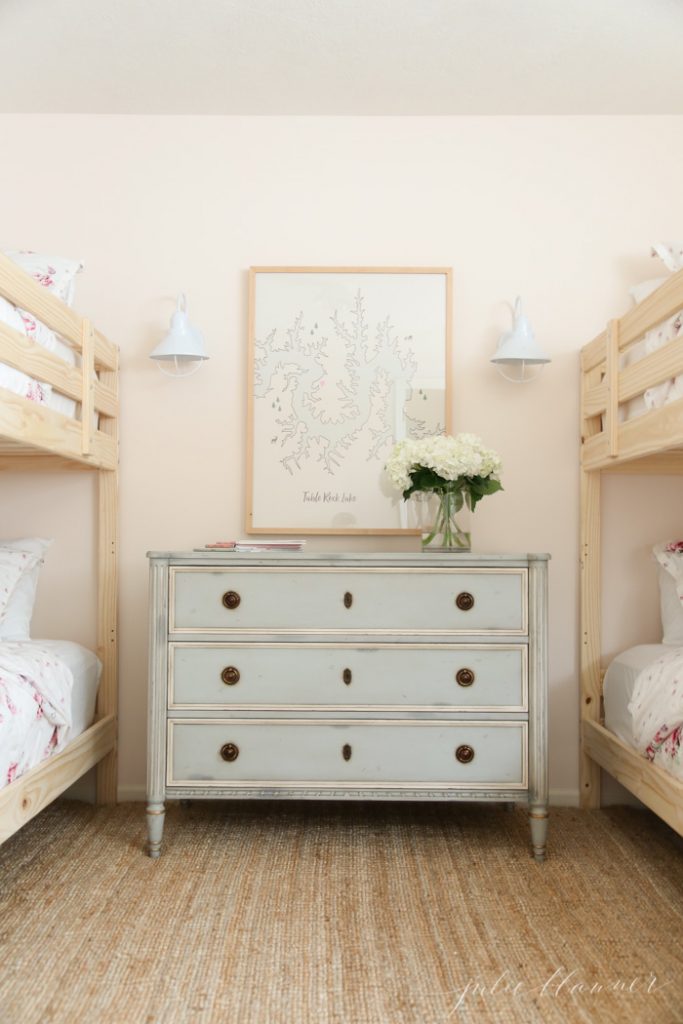
Photo via Julie Blanner.
We both loved everything about the light blue dresser that started us down this color palette road. Except that the kids will need to share one dresser and this one only had three drawers. We also had neither the budget for an antique nor the time to scout out a vintage deal (although if we had the budget, aren't these dreamy?).
Whitney has already been asked several times about our inspiration dresser after she reposted last week's color palette on Instagram. For those who have both budget and time, consider this option. I'm fairly certain with some paint and elbow grease, you could create a pretty nice approximation. Painting both the room and bed, and Dusty adding built-ins to the closet, was enough work for us for this six week project. We chose to look elsewhere for dressers.
While we both would have been happy to use the dresser that was already in C's room (you can see a bit of this in a photo above), it also only had three drawers, and I felt like the drawers were too big for the kids to open on their own. I wanted something that could easily divide in half, with drawers that could actually fit clothes (no puny drawers) but would not be a challenge for the kids to open on their own. I also wanted something with drawer stoppers so that drawers would not end up on the floor. (I may have some personal experience with this last bit.)
Dressers are not inexpensive, especially if they are well made. I did quite a bit of searching for Whitney on this one. It's safe to say that quality dressers under $1,000 are hard to come by. We were very close to using the IKEA Hemnes 8-drawer dresser in grey or white for its simplicity and functionality (and at $250, the price is unbeatable). At the last minute, I found two dresser makeovers using the IKEA Tarva dresser: here and here. This dresser is made of pine rather than MDF. It is slightly narrow compared to a standard dresser (15-16" rather than 19-20") but we are talking about kids' clothes here. Plus, we could paint the dresser blue. I guess we didn't have enough to do in the six week period after all...
Still to do
So we have a painted room, a rug, and we've ordered a bed and dresser. The other major thing we have left on the list is to add built-ins to the closet. We also need to:
- Pick a blue paint and knobs for the dresser.
- Find lighting.
- Replace the glass shelves on the existing shelf units with wood (and possibly repaint the shelves white).
- Create a play space/toy storage situation.
- Add art.
- Decide on bedding.
- Decide on curtains.
- Find some hip PJ Masks/Princess goods that will please both Whitney and her kids.
Not a small list with only three weeks left to go. While I get to work on that, you should definitely check out the progress of the featured designers and guest participants at this half way point. I'll be catching up when we are done!